Baklava Servings: Middle Eastern Layered Phyllo Pastry
Calculate perfect portions of authentic Baklava. Master the art of crisp phyllo, spiced nuts, and sweet syrup in this iconic Turkish dessert!
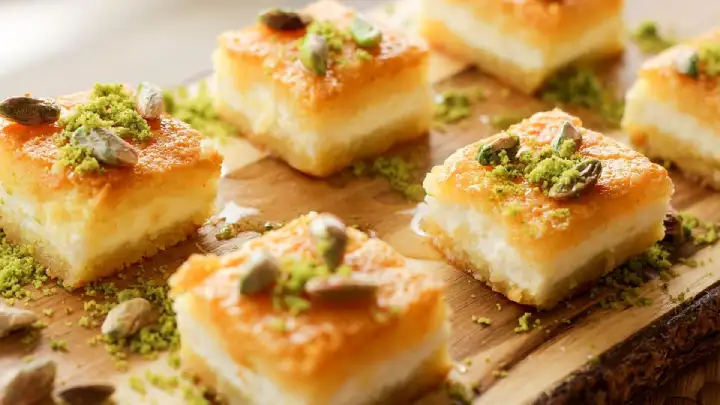
Table of Content
Traditional Turkish Baklava
Click here to see more portionsBaklava is one of the most celebrated desserts of the Middle East and the Mediterranean—a stack of impossibly thin, buttery phyllo sheets layered with finely chopped nuts, cut into diamonds or squares, and finished with a sweet syrup that seeps into every crisp layer. Its exact birthplace is fiercely debated among Turkey, Greece, and several Middle Eastern nations, but most food historians trace baklava's lineage to the kitchens of the Ottoman Empire's Topkapi Palace, where pastry chefs perfected the technique of stretching dough into paper-thin sheets, a skill that itself may descend from even older Central Asian and Byzantine layered-pastry traditions. What makes baklava so distinctive is the dramatic contrast it achieves: dozens of delicate phyllo layers, brushed individually with melted butter, bake into a structure that's simultaneously crackly-crisp and meltingly rich, while the nut filling—usually walnuts, pistachios, or a combination—adds texture and earthy depth. The defining final step, pouring hot or cold syrup over the freshly baked pastry, is what truly makes baklava what it is; the syrup soaks downward through the layers, sweetening and slightly softening the top while the very bottom layers stay crisp longer, creating a textural gradient in every bite. Baklava is a dessert of patience and precision—handling phyllo demands care, since the sheets dry out and crack within minutes of being unwrapped—but the payoff is a pastry so prized it appears at celebrations, religious holidays, and family gatherings across an enormous swath of the world, each region adding its own preferred nuts, spicing, and syrup flavoring to the same essential template.
| Ingredient | Amount |
|---|---|
| For the Pastry: | |
| Phyllo Dough Sheets | 10 pieces (thawed, kept covered with a damp towel) |
| Butter | 150g (unsalted, melted, for brushing) |
| For the Nut Filling: | |
| Walnuts | 200g (finely chopped, not ground to dust) |
| Pistachios | 100g (shelled, finely chopped) |
| Cinnamon | 1 tsp (ground, mixed into the nuts) |
| For the Syrup: | |
| Sugar | 150g (granulated, for the syrup) |
| Cloves | 0.5 tsp (whole, for infusing the syrup) |
Instructions:
1. Prepare the Nut Filling:
Pulse the walnuts and pistachios in a food processor in short bursts until finely chopped, taking care not to over-process into a paste or powder—you want texture, not nut butter. Transfer the chopped nuts to a bowl and stir in the ground cinnamon, mixing thoroughly so the spice distributes evenly throughout. Set this nut mixture aside; it should be fragrant and have a coarse, sand-like consistency that will layer easily between the phyllo sheets.
2. Prepare Your Workspace and Phyllo:
Phyllo dries out and becomes brittle within minutes of exposure to air, so prepare everything before unwrapping it: melt the butter, have your pastry brush ready, and clear a clean, dry workspace. Once you unwrap the phyllo sheets, keep the stack covered with a slightly damp kitchen towel at all times except for the single sheet you're actively working with. Brush a 9x13 inch baking pan generously with melted butter to prevent sticking and help the bottom layer crisp properly.
3. Layer the Bottom Phyllo Base:
Lay one sheet of phyllo into the prepared pan, letting any excess drape over the edges if your sheets are larger than the pan—you'll trim this later. Brush it lightly but thoroughly with melted butter, reaching every corner. Repeat with half of your phyllo sheets, brushing butter between each individual layer. This base should be substantial, as it needs to support the nut filling and stay structurally sound when sliced after baking.
4. Add the Nut Filling:
Spread the spiced nut mixture evenly over the layered phyllo base, pressing down gently with your hands or the back of a spoon to create a uniform layer that reaches all the way to the edges of the pan. An even distribution here ensures every slice gets the same proportion of nuts to pastry, which matters both for flavor balance and for clean, attractive cutting once it's baked.
5. Layer the Top Phyllo and Butter Generously:
Continue layering the remaining phyllo sheets over the nuts, brushing each one with melted butter just as you did for the base. The top layers are what create baklava's signature shattering crispness, so don't skimp on the butter here—a well-buttered top is the difference between a dry, tough crust and one that bakes into golden, flaky shards. Trim any overhanging edges of phyllo with a sharp knife or scissors for a tidy presentation.
6. Score the Pastry Before Baking:
Using a sharp knife, cut the unbaked baklava into diamond or square shapes, slicing all the way down to the bottom of the pan. Cutting before baking, rather than after, is essential—it allows the hot syrup to penetrate every layer evenly once the pastry comes out of the oven, and prevents the brittle baked phyllo from shattering unevenly under the knife. Traditional diamond shapes are achieved by cutting parallel diagonal lines in both directions across the pan.
7. Bake to Golden Perfection:
Bake in a preheated oven at 160-175°C (325-350°F) for 45-55 minutes, until the top is deeply golden brown and the layers look crisp and flaky throughout. Lower, slower baking is preferable to a hot, fast oven, which can brown the top before the inner layers have had time to crisp through. Check periodically toward the end and rotate the pan if your oven heats unevenly, since baklava can go from golden to overly dark quickly in the final minutes.
8. Make and Pour the Syrup:
While the baklava bakes, combine the sugar with an equal amount of water and the whole cloves in a saucepan, bringing it to a boil and then simmering for 8-10 minutes until it thickens slightly into a light syrup—it shouldn't reduce so much that it turns thick and candy-like. A classic technique is the temperature contrast method: pour hot syrup over a cooled baklava, or cold syrup over a hot baklava straight from the oven, as the temperature difference helps the syrup absorb evenly without making the pastry soggy. Pour the syrup slowly and evenly over the entire pan, making sure it reaches into every pre-cut slice.
9. Rest and Serve:
Let the syrup-soaked baklava rest at room temperature for at least 4-6 hours, though overnight is best, allowing the syrup time to fully penetrate every layer without leaving the top soggy. Once rested, run a knife back along the original score lines to fully separate the pieces, then transfer them carefully to a serving platter. Baklava keeps well at room temperature, covered, for up to a week, and the flavor often improves after a day as the syrup, butter, and spiced nuts continue to meld.
Kitchen Wisdom & Phyllo Pastry Traditions:
- Keep Phyllo Covered: Exposed phyllo dries and cracks within minutes. Always keep unused sheets under a damp towel while you work.
- Butter Every Single Layer: Skipping butter on even one or two layers creates dry pockets that won't crisp properly. Be thorough and generous.
- Cut Before, Not After Baking: Pre-cutting allows syrup to soak evenly into every piece and prevents the baked, brittle pastry from shattering when sliced.
- Mind the Temperature Contrast: Pouring cold syrup over hot baklava (or vice versa) helps the syrup absorb fully without turning the pastry mushy.
- Don't Skip the Resting Time: Baklava needs several hours, ideally overnight, for the syrup to distribute through all the layers. Cutting in too soon results in a dry top and soggy bottom.
- Chop, Don't Pulverize, the Nuts: Finely chopped nuts give baklava its characteristic texture; over-processing into powder or paste loses that bite.
- Low and Slow Baking: A moderate oven temperature lets every layer crisp through evenly, rather than browning the top before the inside is done.
- Trim Neatly: Tidying overhanging phyllo edges before baking gives a cleaner, more professional final presentation.
- Whole Spices in Syrup: Cloves or cinnamon sticks simmered in the syrup (then removed) add subtle aromatic depth without overpowering the nuts.
- Storage Improves Flavor: Baklava stored at room temperature, covered, often tastes even better a day or two after baking as the flavors continue to meld.
Ottoman Heritage & Shared Culinary Legacy
Baklava's history is deeply entwined with the Ottoman Empire, whose imperial kitchens at Topkapi Palace in Istanbul are widely credited with refining the dessert into the form recognized today, complete with the now-famous "Baklava Alayı" (Baklava Procession), a ceremonial event during the holy month of Ramadan in which trays of baklava were carried from the palace kitchens to the city's Janissary soldiers as a gesture of imperial generosity. As the Ottoman Empire expanded across the Balkans, the Middle East, and North Africa, baklava traveled with it, taking root in the culinary traditions of Greece, Lebanon, Syria, Armenia, Azerbaijan, and beyond—each culture adapting the recipe with local nuts, spices, and syrup flavorings, from rosewater in the Levant to orange blossom water in North Africa. This shared heritage has also made baklava a point of cultural pride and occasional friendly rivalry among the nations that claim it, with Turkey, Greece, and others each asserting their version as definitive. Regardless of which claim one favors, baklava today remains a dessert closely tied to celebration and hospitality, commonly served during religious holidays like Ramadan and Easter, at weddings, and whenever guests are welcomed into a home, embodying the layered, generous spirit of the cultures that have claimed and refined it over centuries.
Crisp, syrup-soaked, and impossibly rich, baklava is a dessert worth the patience it demands. Afiyet olsun! (May it be good for your health!)
Calculate Portions by Guest Count
Select the number of people you're serving to get precise measurements
Portions for
2 People
300 g total Baklava
Portions for
4 People
600 g total Baklava
Portions for
6 People
900 g total Baklava
Portions for
8 People
1200 g total Baklava
Portions for
10 People
1500 g total Baklava
Portions for
12 People
1800 g total Baklava
Portions for
15 People
2250 g total Baklava
Portions for
20 People
3000 g total Baklava
Portions for
30 People
4500 g total Baklava
Portions for
50 People
7500 g total Baklava
Portions for
75 People
11250 g total Baklava
Portions for
100 People
15000 g total Baklava
Portions for
200 People
30000 g total Baklava
Quick Reference Guide
150g
Per Serving
600g
For 4 People
1500g
For 10 People
7.5kg
For 50 People
Related Categories
Pro Tips
- • Always prepare slightly more than calculated to account for hearty appetites
- • Consider the occasion: formal dinners typically require more precise portions
- • Account for side dishes when planning main course quantities
- • Store leftovers properly to minimize waste and extend freshness