Katsu Curry Servings: Japanese Comfort Food Classic
Calculate perfect portions of authentic Katsu Curry. Master Japan's beloved crispy breaded cutlet smothered in rich, savory curry sauce over steamed rice!
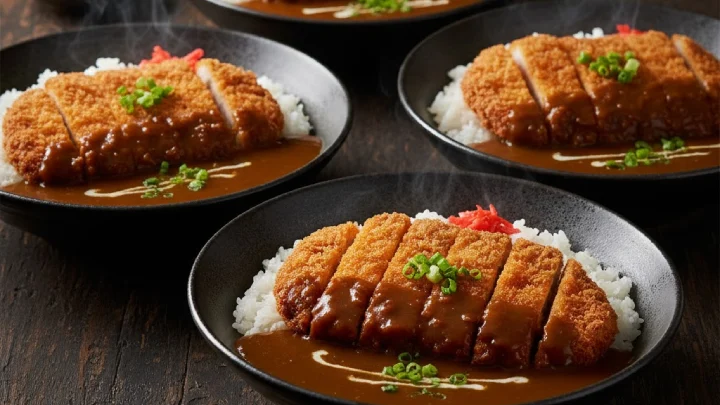
Table of Content
Traditional Japanese Katsu Curry
Click here to see more portionsKatsu Curry stands as one of Japan's most beloved comfort foods—a glorious marriage of crispy, golden-breaded pork cutlet and rich, savory curry sauce ladled generously over fluffy white rice. This dish represents yoshoku, Western-influenced Japanese cuisine that emerged during the Meiji era when Japan opened to international trade. The British brought curry from India, which the Japanese transformed into something uniquely their own—milder, sweeter, thicker, and more vegetable-forward than its Indian ancestor. When combined with tonkatsu (breaded pork cutlet, itself inspired by European schnitzel), magic happens: the shatteringly crisp panko coating contrasts beautifully with the velvety, aromatic curry, while the cutlet's juicy interior and the sauce's complex flavors create perfect harmony. Each element shines individually, but together they form something transcendent—simultaneously familiar and exotic, indulgent yet comforting, crispy and saucy, simple and sophisticated. From school cafeterias to family tables to specialty curry houses across Japan, katsu curry has earned its place as ultimate comfort food.
| Ingredient | Amount |
|---|---|
| For the Pork Katsu: | |
| Pork Loin Cutlets | 600g (4 cutlets, about 1.5cm thick) |
| All-Purpose Flour | 100g (for dredging) |
| Eggs | 3 large (beaten) |
| Panko Breadcrumbs | 200g (Japanese-style, coarse) |
| Vegetable Oil | 500ml (for deep-frying) |
| Salt & Pepper | Salt (4g), Black Pepper (2g) |
| For the Japanese Curry Sauce: | |
| Onions | 300g (2 large, sliced) |
| Carrots | 200g (2 medium, cut into chunks) |
| Potatoes | 300g (2 medium, cut into chunks) |
| Apple | 150g (1 medium, grated) |
| Garlic Cloves | 15g (3 cloves, minced) |
| Fresh Ginger | 10g (minced or grated) |
| Butter | 40g |
| All-Purpose Flour | 40g (for roux) |
| Curry Powder | 30g (Japanese or S&B brand preferred) |
| Garam Masala | 8g |
| Chicken Stock | 800ml |
| Soy Sauce | 30ml |
| Worcestershire Sauce | 20ml (or tonkatsu sauce) |
| Ketchup | 30g |
| Honey | 20g |
| Bay Leaves | 2 leaves |
| Salt | 4g (to taste) |
| For Serving: | |
| Japanese Short-Grain Rice | 400g (cooked, about 2 cups uncooked) |
| Tonkatsu Sauce | 50ml (optional, for drizzling) |
Instructions:
1. Prepare the Pork Cutlets:
The foundation of great katsu is properly prepared pork. Choose boneless pork loin chops about 1.5 cm thick—this thickness ensures the meat stays juicy while the coating crisps perfectly. If your cutlets have a strip of fat along one edge, make small incisions every 2 cm through the fat and into the meat slightly—this prevents the cutlet from curling during frying. Place each cutlet between two sheets of plastic wrap and gently pound with a meat mallet or heavy pan until uniformly about 1 cm thick. This tenderizes the meat and ensures even cooking. Season both sides generously with salt and freshly ground black pepper. Let the cutlets rest at room temperature for 15-20 minutes while you prepare the breading station—this promotes even cooking and better seasoning penetration. Pat the meat completely dry with paper towels just before breading; moisture is the enemy of crisp coating.
2. Set Up Your Breading Station:
Organization is crucial for perfect breading. Set up three shallow dishes in assembly-line fashion: first dish with all-purpose flour seasoned lightly with salt and pepper; second dish with beaten eggs (add a tablespoon of water to thin them slightly for better coating); third dish with panko breadcrumbs. Japanese panko is essential—its large, airy flakes create that signature light, crispy, almost lacey texture that regular breadcrumbs can't match. Pour the panko into a wide, shallow dish to make coating easier. Have a clean plate ready for the breaded cutlets. Keep one hand designated as your "dry hand" for flour and panko, and the other as your "wet hand" for the egg wash—this prevents your fingers from becoming breaded and makes the process much cleaner and more efficient.
3. Execute the Perfect Three-Step Breading:
This classic technique creates that shatteringly crisp coating. Take one cutlet and dredge it completely in flour, shaking off excess—the flour helps the egg adhere. Using your wet hand, dip the floured cutlet into beaten egg, turning to coat completely and letting excess drip back into the dish. Transfer to the panko and press gently but firmly with your dry hand, ensuring breadcrumbs adhere to every surface. Flip and repeat on the other side. Press the panko into the meat—it should look generously coated with breadcrumbs visible on all surfaces. Place on the clean plate. Repeat with remaining cutlets. Let the breaded cutlets rest for 10-15 minutes before frying—this crucial step allows the coating to adhere properly and prevents it from falling off during frying. The coating should look fluffy and substantial, almost like a fuzzy coat on the meat.
4. Build the Curry Sauce Foundation:
While the breaded cutlets rest, start the curry sauce—it needs time to develop flavors. Heat 2 tablespoons of vegetable oil in a large pot or Dutch oven over medium heat. Add the sliced onions with a pinch of salt and cook, stirring occasionally, for 15-20 minutes until deeply golden and caramelized. This patient caramelization is non-negotiable—it creates the sauce's sweet, complex base flavor. The onions should be soft, jammy, and significantly reduced. Add the minced garlic and ginger and cook for 2 minutes until fragrant. Add the carrots and potatoes, stirring to coat with the aromatic mixture. The vegetables should glisten with the caramelized onions. This foundation of sweetly caramelized aromatics and hearty vegetables distinguishes Japanese curry from other curry styles.
5. Create the Curry Roux:
Push the vegetables to the sides of the pot, creating a space in the center. Add the butter and let it melt completely. Sprinkle the flour over the melted butter and stir constantly with a wooden spoon, cooking for 2-3 minutes until the mixture turns golden and smells nutty—this is your roux, the thickening agent. Add the curry powder and garam masala directly to the roux, stirring vigorously for about 1 minute. This blooms the spices in the fat, releasing essential oils and deepening flavors dramatically. The kitchen should fill with an intoxicating, aromatic fragrance. The mixture will be thick and paste-like—this is perfect. Now gradually pour in the chicken stock, stirring constantly to prevent lumps. The roux will dissolve into the liquid, creating a smooth, thickening sauce. Add the grated apple, soy sauce, Worcestershire sauce, ketchup, honey, and bay leaves. The apple is a signature Japanese touch, adding natural sweetness and helping thicken the sauce while lending subtle fruity complexity.
6. Simmer the Curry to Perfection:
Bring the curry to a gentle boil, then reduce heat to low and simmer uncovered for 30-40 minutes, stirring occasionally. The vegetables should become completely tender, almost melting into the sauce. The curry will thicken considerably as it simmers—the potatoes break down slightly, releasing starch that adds body, while the apple virtually dissolves, creating that characteristic sweetness and velvety texture. The sauce should coat the back of a spoon heavily and have a rich, deep brown color. If it becomes too thick, add a splash of stock or water; if too thin, simmer longer or mash some potato pieces against the pot's side to release more starch. Taste and adjust seasoning with salt, and remove the bay leaves. The curry should taste complex: savory, slightly sweet, warmly spiced but not fiery, with umami depth from the soy sauce and richness from the butter. For ultra-smooth restaurant-style curry, you can blend it partially or completely, though rustic chunks are traditional for home cooking.
7. Deep-Fry the Katsu to Golden Glory:
In a deep, heavy pot or deep fryer, heat vegetable oil to 170-175°C (340-350°F). Use enough oil so cutlets can float freely—at least 5 cm deep. Temperature is critical: too hot and the coating burns before the meat cooks; too cool and you get greasy, soggy katsu. Test with a panko crumb—it should sizzle immediately and rise to the surface. Carefully lower one or two cutlets into the oil, depending on pot size—don't crowd, which drops temperature. Fry for 4-5 minutes without moving, then gently flip and fry another 4-5 minutes until deep golden brown and the coating looks shatteringly crisp. The panko should be a beautiful amber color, almost mahogany in spots. Use a spider strainer or slotted spoon to transfer to a wire rack set over a baking sheet—never drain on paper towels, which steam and soften the coating. Let rest for 3-4 minutes while you fry remaining cutlets. The resting period allows juices to redistribute and the coating to set. The exterior should crackle when you touch it.
8. Slice with Japanese Precision:
Here's a detail that elevates presentation: slice the katsu before plating. Place the cutlet on a cutting board and use a sharp knife to cut it into strips about 2 cm wide. Cut straight down decisively—no sawing motion, which compresses the coating and squeezes out juices. The strips make eating easier, showcase the golden exterior and juicy interior in cross-section, and allow the curry to seep between pieces. This slicing technique is standard in Japanese restaurants and transforms rustic fried cutlet into elegant presentation. Keep the slices together to maintain the cutlet's shape when plating.
9. Assemble and Serve:
In shallow bowls or on plates, mound a generous portion of hot, fluffy Japanese short-grain rice on one side—the rice should be sticky enough to hold together but not mushy. Carefully transfer the sliced katsu to the other side of the plate, slightly fanning out the pieces to show the beautiful cross-section. Ladle the rich curry sauce generously over the rice and partially over the katsu—some cooks keep the katsu mostly uncovered to preserve crispness, while others smother it completely for maximum sauce enjoyment. There's no wrong answer; both approaches are traditional. Garnish with a drizzle of tonkatsu sauce if desired, though the curry provides plenty of flavor. Serve immediately while the katsu is still crackling crisp and the curry is piping hot. The magic happens as you eat: the crispy coating gradually softens in the curry, creating textural evolution from crackly to pleasantly tender, while the curry-soaked rice provides creamy counterpoint to the rich meat.
Japanese Kitchen Secrets & Curry House Wisdom:
- The Panko Difference: Japanese panko creates exponentially superior texture to regular breadcrumbs. Its large, airy flakes stay crispier longer and create that signature light, almost lacey coating. Don't substitute regular breadcrumbs—seek out proper panko.
- Oil Temperature is Everything: Maintain 170-175°C throughout frying. Use a thermometer rather than guessing. Too hot burns the coating; too cool makes greasy katsu. Adjust heat between batches to maintain temperature.
- The Apple Secret: Grated apple is Japanese curry's not-so-secret weapon, adding natural sweetness, fruity complexity, and helping create that characteristic thick, glossy texture. Some recipes use grated apple and pear together.
- Curry Block Shortcut: Many Japanese home cooks use store-bought curry blocks (S&B Golden Curry, Vermont Curry, Java Curry) instead of making sauce from scratch. These blocks are exceptional, widely available, and completely authentic—no shame in this shortcut.
- Double-Fry Technique: For extra-crispy katsu, try the professional method: fry at 160°C for 6 minutes, rest 3 minutes, then fry again at 180°C for 1-2 minutes. This ensures juicy interior with ultra-crisp exterior.
- Chicken Katsu Alternative: Substitute boneless, skinless chicken breasts for pork—pound to even thickness and fry for slightly less time. Chicken katsu curry is equally beloved and traditional.
- Rice Matters: Japanese short-grain rice is essential—its sticky texture and subtle sweetness complement curry perfectly. Long-grain or basmati rice changes the dish's character entirely.
- Curry Depth Boosters: For even richer flavor, add a square of dark chocolate, a spoonful of instant coffee, or red wine to the simmering curry. These umami boosters add complexity without identifiable flavor.
- Make-Ahead Strategy: Curry tastes even better the next day as flavors meld and deepen. Make it a day ahead, refrigerate, then gently reheat. Fry katsu fresh for best results, though leftover katsu reheats well in a 180°C oven.
Yoshoku Heritage & Cultural Fusion
Katsu curry embodies yoshoku—Western-influenced Japanese cuisine born during the Meiji Restoration when Japan opened to Western trade after centuries of isolation. The British Navy introduced curry from colonial India, which Japanese cooks adapted to local tastes: milder heat, sweeter profile, thicker consistency, and vegetables like carrots and potatoes. Tonkatsu emerged separately, inspired by European schnitzel but distinctly Japanese with its panko coating and precise frying technique. Combining them created katsu curry—a dish with no equivalent in India or Britain, purely Japanese despite its international influences. It became school lunch staple, family dinner favorite, and specialty restaurant offering. Curry houses like CoCo Ichibanya built empires on customizable katsu curry. The dish represents Japan's genius for cultural adaptation: respecting foreign origins while transforming them into something uniquely Japanese, accessible, and universally beloved. Today, katsu curry symbolizes comfort, nostalgia, and the beautiful outcomes of cultural exchange through food.
This golden-crusted treasure proves that fusion cuisine at its finest transcends origins to create something entirely new. Each bite celebrates the marriage of crispy and saucy, simple and sophisticated, foreign and familiar. Itadakimasu! (Let's eat!)
Calculate Portions by Guest Count
Select the number of people you're serving to get precise measurements
Portions for
2 People
800 g total Katsu-curry
Portions for
4 People
1600 g total Katsu-curry
Portions for
6 People
2400 g total Katsu-curry
Portions for
8 People
3200 g total Katsu-curry
Portions for
10 People
4000 g total Katsu-curry
Portions for
12 People
4800 g total Katsu-curry
Portions for
15 People
6000 g total Katsu-curry
Portions for
20 People
8000 g total Katsu-curry
Portions for
30 People
12000 g total Katsu-curry
Portions for
50 People
20000 g total Katsu-curry
Portions for
75 People
30000 g total Katsu-curry
Portions for
100 People
40000 g total Katsu-curry
Portions for
200 People
80000 g total Katsu-curry
Quick Reference Guide
400g
Per Serving
1600g
For 4 People
4000g
For 10 People
20kg
For 50 People
Related Categories
Pro Tips
- • Always prepare slightly more than calculated to account for hearty appetites
- • Consider the occasion: formal dinners typically require more precise portions
- • Account for side dishes when planning main course quantities
- • Store leftovers properly to minimize waste and extend freshness