Pierogi Servings: Polish Comfort in Every Bite
Calculate perfect portions of authentic Polish Pierogi. Master these beloved dumplings filled with potatoes, cheese, and tradition!
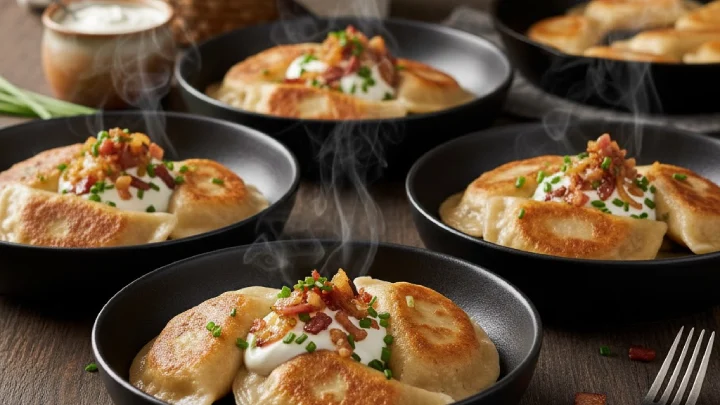
Table of Content
Traditional Polish Pierogi Ruskie
Click here to see more portionsPierogi are Poland's most cherished culinary treasure—tender pockets of handmade dough cradling savory or sweet fillings, each one a small parcel of comfort and tradition. These iconic dumplings have graced Polish tables for centuries, from humble farmhouses to grand celebrations. The most beloved variety, Pierogi Ruskie (despite the name, thoroughly Polish), features a hearty filling of mashed potatoes, creamy farmers cheese, and caramelized onions. Making pierogi is traditionally a communal affair, with families gathering to fold dozens together, sharing stories and laughter. Whether boiled until tender, then pan-fried in butter until golden and crispy, these pillowy dumplings represent the heart of Polish home cooking—simple ingredients transformed through care and tradition into something extraordinary.
| Ingredient | Amount |
|---|---|
| For the Dough: | |
| All-Purpose Flour | 400g (about 3¼ cups) |
| Warm Water | 180ml (¾ cup) |
| Egg | 1 large |
| Sour Cream | 60g (¼ cup) |
| Vegetable Oil | 15ml (1 tbsp) |
| Salt | 5g (1 tsp) |
| For the Filling: | |
| Potatoes | 600g (4-5 medium) |
| Farmers Cheese/Cottage Cheese | 250g |
| Onions | 200g (2 medium) |
| Butter | 80g |
| Salt | 8g (to taste) |
| Black Pepper | 3g (freshly ground) |
| Fresh Chives | 15g (for garnish) |
Instructions:
1. Make the Dough:
In a large mixing bowl, combine the flour and salt. Create a well in the center. In a separate bowl, whisk together the warm water, egg, sour cream, and oil until smooth. The sour cream is the secret ingredient that makes pierogi dough exceptionally tender and pliable. Pour the wet ingredients into the flour well and begin mixing with a fork, gradually incorporating the flour from the edges. When the mixture becomes too thick to stir, turn it out onto a lightly floured surface and knead by hand for 8-10 minutes. The dough should transform from shaggy and sticky to smooth, elastic, and slightly tacky to the touch. If it's too dry, add water one teaspoon at a time; if too sticky, add small amounts of flour. Proper kneading develops the gluten, creating dough that's strong enough to hold filling yet tender when cooked. Form into a ball, wrap tightly in plastic wrap, and let rest at room temperature for 30 minutes. This resting period allows the gluten to relax, making the dough much easier to roll out thin.
2. Prepare the Filling:
While the dough rests, prepare your filling. Peel the potatoes and cut them into evenly-sized chunks. Place in a pot of cold salted water and bring to a boil. Cook for 15-20 minutes until completely tender when pierced with a fork. Drain thoroughly and return to the hot pot for a minute to steam off excess moisture—dry potatoes make the best filling. Mash the potatoes until completely smooth with no lumps. While still warm, add the farmers cheese (or well-drained cottage cheese) and mash together until well combined. The warmth helps the cheese incorporate smoothly. Meanwhile, finely dice the onions. In a large skillet, melt half the butter over medium heat. Add the onions and cook slowly for 15-20 minutes, stirring occasionally, until deeply golden and caramelized. The slow caramelization brings out their natural sweetness and adds incredible depth to the filling. Add half the caramelized onions to the potato-cheese mixture, reserving the rest for topping. Season generously with salt and freshly ground black pepper. Mix thoroughly and taste—the filling should be well-seasoned and flavorful on its own. Let cool to room temperature before filling pierogi.
3. Roll and Cut the Dough:
Divide the rested dough in half, keeping one portion covered while you work with the other. On a lightly floured surface, roll the dough very thin—about 2mm (1/16 inch) thick. Traditional pierogi dough should be thin enough to see your hand through it when held up to the light, yet strong enough not to tear. Using a round cutter (about 8-10cm/3-4 inches in diameter), cut out circles. A drinking glass or bowl works perfectly if you don't have a cutter. Gather the scraps, re-roll once, and cut more circles. Place the circles on a lightly floured kitchen towel to prevent sticking.
4. Fill and Shape the Pierogi:
This is where tradition and technique come together. Hold a dough circle in your palm. Place about 1 tablespoon of filling in the center—don't overfill, as this makes sealing difficult. Fold the dough over to create a half-moon shape. Starting at one end, pinch the edges together firmly, working your way around the semicircle. The seal must be complete with no gaps, or the filling will escape during cooking. For extra security and traditional appearance, crimp the sealed edge by pressing it with your fingers or a fork, creating a decorative ridged pattern. This crimping not only looks beautiful but reinforces the seal. Place finished pierogi on a floured tray, not touching each other. Continue until all dough and filling are used. You should have approximately 30-35 pierogi. At this point, you can freeze them on the tray, then transfer to bags for later use—they cook beautifully straight from frozen.
5. Boil the Pierogi:
Bring a large pot of salted water to a gentle boil. Working in batches to avoid overcrowding, carefully drop the pierogi into the water. They'll sink to the bottom initially—this is normal. Stir gently once with a wooden spoon to prevent sticking. As they cook, the pierogi will rise to the surface, which takes about 3-4 minutes. Once they float, cook for an additional 2-3 minutes. The dough should be tender and cooked through, with no raw flour taste. Using a slotted spoon, carefully remove the pierogi and place them in a colander to drain briefly. At this point, you can serve them simply with butter and sour cream, or proceed to the next step for the traditional crispy finish.
6. Pan-Fry for Golden Perfection:
For the most traditional and delicious preparation, pan-fry the boiled pierogi. In a large skillet, melt the remaining butter over medium-high heat. Add the reserved caramelized onions and heat through. Working in batches if necessary, add the boiled pierogi to the skillet in a single layer. Cook without moving them for 3-4 minutes, until the bottoms develop a beautiful golden-brown crust. Flip carefully with a spatula and cook the other side for another 2-3 minutes until equally golden and crispy. The contrast between the crispy exterior and tender interior is what makes pierogi truly spectacular. Transfer to a serving platter, spooning the buttery caramelized onions over the top.
7. Serve with Traditional Accompaniments:
Serve the pierogi hot, garnished with the pan-fried onions and a generous dollop of cold sour cream. The temperature contrast between hot pierogi and cold sour cream is essential to the experience. Sprinkle with fresh chopped chives for color and a mild onion flavor. Some families also serve pierogi with crispy bacon bits (called "skwarki") for extra richness. Each person should have a hearty portion—pierogi are meant to be enjoyed generously, not timidly!
Babcia's Secrets & Traditional Wisdom:
- The Dough Temperature: Use warm (not hot) water for the dough. This helps the flour absorb moisture evenly and makes the dough easier to work with. Cold water creates tough dough; hot water can cook the egg.
- Resting is Essential: Never skip the 30-minute rest. Rushed dough is elastic and fights back when rolled, making thin circles nearly impossible. Rested dough rolls out effortlessly and stays thin.
- Farmers Cheese vs. Cottage Cheese: Traditional Polish farmers cheese (twaróg) is drier and less grainy than American cottage cheese. If using cottage cheese, drain it thoroughly in a fine-mesh sieve or cheesecloth for at least 30 minutes before use.
- Sweet Variations: Pierogi aren't always savory! Try fillings of sweetened farmers cheese with vanilla, fresh blueberries with sugar, or prune jam. Serve sweet pierogi with melted butter, sugar, and sour cream.
- Make It a Party: Traditional Polish families host pierogi-making parties called "pierogi parties." Multiple generations gather to make hundreds of pierogi together, with assembly-line efficiency and lots of storytelling.
- Freezing Perfection: Pierogi freeze exceptionally well. Freeze uncooked on a tray, then transfer to bags. Cook straight from frozen, adding 2-3 extra minutes to boiling time. This makes them perfect for meal prep.
- The Seal Test: Before cooking, hold each pieróg up and inspect the seal in the light. Any tiny gaps will leak during cooking. It's worth taking time to seal them properly.
- Other Classic Fillings: Try sauerkraut with mushrooms (for Christmas Eve), ground meat with onions, or seasonal options like pumpkin or spinach with cheese.
- Equipment Tip: A pierogi maker (a hinged press) speeds up production dramatically and creates perfectly sealed edges. However, hand-folding is traditional and meditative.
Cultural Tradition
Pierogi hold a sacred place in Polish culture, appearing at every important life event—weddings, christenings, holidays, and Sunday family dinners. The tradition of making pierogi together strengthens family bonds, with grandmothers teaching grandchildren the delicate art of folding and sealing. In Poland, entire festivals celebrate pierogi, and families fiercely defend their traditional recipes. The dish has traveled worldwide with Polish immigrants, becoming beloved in communities from Chicago to Toronto to São Paulo. Making pierogi is an act of love—time-consuming and labor-intensive, but the result brings people together around the table, connecting them to generations past and creating memories for generations to come.
These tender, golden pillows of comfort embody everything beautiful about Polish home cooking—simple ingredients, patient craftsmanship, and food that nourishes both body and soul. Smacznego! (Enjoy your meal!)
Calculate Portions by Guest Count
Select the number of people you're serving to get precise measurements
Portions for
2 People
500 g total Pierogi
Portions for
4 People
1000 g total Pierogi
Portions for
6 People
1500 g total Pierogi
Portions for
8 People
2000 g total Pierogi
Portions for
10 People
2500 g total Pierogi
Portions for
12 People
3000 g total Pierogi
Portions for
15 People
3750 g total Pierogi
Portions for
20 People
5000 g total Pierogi
Portions for
30 People
7500 g total Pierogi
Portions for
50 People
12500 g total Pierogi
Portions for
75 People
18750 g total Pierogi
Portions for
100 People
25000 g total Pierogi
Portions for
200 People
50000 g total Pierogi
Quick Reference Guide
250g
Per Serving
1000g
For 4 People
2500g
For 10 People
12.5kg
For 50 People
Related Categories
Pro Tips
- • Always prepare slightly more than calculated to account for hearty appetites
- • Consider the occasion: formal dinners typically require more precise portions
- • Account for side dishes when planning main course quantities
- • Store leftovers properly to minimize waste and extend freshness