Pasta Servings: Fresh Homemade Egg Pasta Dough
Calculate perfect portions of fresh homemade pasta. Master Italy's classic egg pasta dough technique from scratch with just a few ingredients!
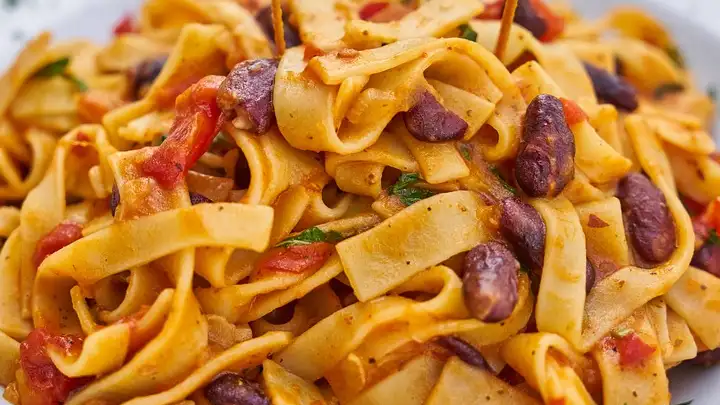
Table of Content
Traditional Italian Fresh Egg Pasta
Click here to see more portionsFresh egg pasta is the foundation of Italy's most cherished regional cooking, especially across Emilia-Romagna and the rest of northern Italy, where wheat flour and eggs have been worked into silky dough by hand for centuries before being cut into tagliatelle, fettuccine, pappardelle, or filled into tortellini and ravioli. Unlike the dried, extruded pasta made from semolina and water that dominates southern Italian cooking and most supermarket shelves, fresh egg pasta relies on a simple ratio of soft wheat flour and whole eggs, kneaded into a smooth, elastic dough that's rolled thin and tender. The egg yolks give the dough its golden hue and rich, slightly custardy flavor, while the proteins in both the flour and egg form a gluten and protein network that allows the dough to be rolled paper-thin without tearing—something water-based dough struggles to achieve. A touch of milk, butter, and olive oil, as in this version, adds extra suppleness and a subtle richness that makes the finished noodles taste silkier on the tongue. Making fresh pasta from scratch is one of the most rewarding kitchen rituals precisely because it asks for so little—just a handful of ingredients and your own hands—yet rewards patience and technique with a texture no boxed pasta can replicate: tender, slightly chewy, and able to hold sauce in a way that dried pasta's smoother surface cannot. It's a skill passed down at kitchen tables across Italy, often taught hand-over-hand from grandmother to grandchild, long before measuring cups ever entered the conversation.
| Ingredient | Amount |
|---|---|
| For the Dough: | |
| Flour | 75g (00 flour or all-purpose, plus extra for dusting) |
| Eggs | 0.75 unit (room temperature, whisked) |
| Milk | 50ml (whole milk, room temperature) |
| Butter | 12.5g (melted and slightly cooled) |
| Salt | 0.25g (fine sea salt) |
| Olive Oil | 0.75ml (for the dough, plus a drizzle for resting) |
Instructions:
1. Mound the Flour and Make a Well:
Pile the flour onto a clean work surface or into a wide mixing bowl, and use your fist or the back of a spoon to press a wide well into the center, leaving a sturdy wall of flour all the way around. This classic "volcano" method, used across Italian kitchens for generations, allows you to gradually incorporate the wet ingredients without flour spilling everywhere, and gives you full control over how much liquid the dough actually absorbs.
2. Combine the Wet Ingredients:
In a small bowl, whisk together the eggs, milk, melted butter, salt, and olive oil until fully combined and slightly frothy. Whisking these together before adding them to the flour well ensures the salt and fat distribute evenly through the dough rather than pooling in one spot, which can lead to uneven texture or tough patches once kneaded.
3. Incorporate the Liquid Gradually:
Pour the egg mixture into the well you formed in the flour. Using a fork, begin whisking the wet ingredients in tight circles, slowly drawing in flour from the inner wall as you go. Work gradually rather than all at once—pulling in too much flour too quickly can create lumps that are difficult to smooth out later. Continue until the mixture thickens into a shaggy, sticky paste that's no longer pourable.
4. Bring the Dough Together:
Once the mixture is too thick to whisk, switch to using a bench scraper or your hands to fold the remaining flour wall into the center, pressing everything into a single rough mass. Don't worry if it looks uneven or craggy at this point—that's normal. Scrape any dry, loose flour into the dough as best you can, but don't force every last bit in if the dough already feels cohesive; a little leftover flour for dusting is fine.
5. Knead Until Smooth and Elastic:
Knead the dough on a lightly floured surface for 8-10 minutes, pressing it away from you with the heel of your hand, folding it back over itself, and rotating a quarter turn between each push. The dough will start out rough and slightly sticky but should transform into a smooth, supple ball that springs back gently when poked. This kneading develops the gluten structure that gives fresh pasta its characteristic chew and lets it stretch thin without tearing.
6. Rest the Dough:
Wrap the kneaded dough tightly in plastic wrap, or place it under an upturned bowl to prevent it from drying out, and let it rest at room temperature for at least 30 minutes, up to 1 hour. This resting period is essential—it allows the gluten that just developed during kneading to relax, which makes the dough significantly easier to roll thin without springing back or tearing.
7. Roll the Dough Thin:
Divide the rested dough into manageable portions and work with one piece at a time, keeping the rest covered. Using a pasta machine or rolling pin, roll the dough progressively thinner, passing it through the machine's widest setting first and narrowing it notch by notch, folding and re-rolling if using a pin. Dust lightly with flour between passes if the dough feels at all sticky. You're aiming for a thin, almost translucent sheet—thin enough to see your hand's shadow through it, but still strong enough to hold together.
8. Cut Into Your Desired Shape:
Once rolled to the desired thickness, cut the pasta sheets into your preferred shape—wide ribbons for pappardelle, narrower strips for tagliatelle or fettuccine, or leave the sheets whole for lasagna or filled pastas like ravioli and tortellini. Dust the cut pasta lightly with flour or fine semolina to prevent sticking, and arrange it in loose nests or hang it over a pasta rack while you finish cutting the rest of the dough.
9. Cook and Serve Fresh:
Bring a large pot of generously salted water to a rolling boil and cook the fresh pasta for just 2-4 minutes—fresh egg pasta cooks dramatically faster than dried pasta because it hasn't been dehydrated. It's ready the moment it floats to the surface and turns tender but still holds its shape. Drain briefly, reserving a splash of the starchy pasta water, and toss immediately with your sauce of choice, letting the residual heat and starchy water help the sauce cling to every strand.
Kitchen Wisdom & Italian Pasta Traditions:
- Room Temperature Eggs: Cold eggs straight from the fridge incorporate less smoothly into the flour. Let them sit out for 20-30 minutes before starting.
- Don't Skip the Rest: A dough that hasn't rested will fight you when rolled, springing back and tearing. The 30-60 minute rest makes all the difference.
- Flour Choice Matters: Finely milled Italian 00 flour gives the smoothest, silkiest texture, though all-purpose flour works well as a substitute.
- Knead by Feel, Not the Clock: The dough is ready when it's smooth and elastic, not simply after a fixed number of minutes—humidity and flour type both affect kneading time.
- Roll Gradually: Jumping straight to the thinnest setting on a pasta machine stresses the dough. Work through each thickness setting in sequence for the best texture.
- Keep Dough Covered: Pasta dough dries out quickly when exposed to air. Always keep portions you're not actively working with wrapped or covered.
- Fresh Pasta Cooks Fast: Unlike dried pasta, fresh egg pasta needs only a couple of minutes in boiling water—watch closely so it doesn't overcook.
- Save the Pasta Water: The starchy cooking water is a valuable tool for loosening and binding sauces; always reserve a cup before draining.
- Dust with Semolina: Fine semolina flour resists clumping better than regular flour when dusting cut pasta shapes, keeping strands separated.
- Freeze for Later: Fresh pasta freezes well in small nests on a tray before being transferred to a bag—no need to thaw before dropping straight into boiling water.
Italian Heritage & Hand-Made Pasta Culture
Fresh egg pasta is most closely associated with Emilia-Romagna and the broader regions of northern and central Italy, where wheat grows abundantly and eggs were historically a readily available, affordable source of richness in everyday cooking. This stands in contrast to southern Italy, where the hotter, drier climate favors durum wheat semolina, water, and sun-drying—the foundation of the dried pasta shapes that traveled the world. In northern households, the skill of making "pasta fatta in casa" (homemade pasta) has traditionally been passed down through generations of women, known affectionately as "sfogline," who could roll a sheet of dough so thin and even by hand that it became a point of family and regional pride. Sunday lunches built around fresh tagliatelle, tortellini in broth, or hand-folded ravioli remain a cherished ritual in many Italian families, often involving multiple generations gathered around a flour-dusted table. While industrial pasta-making and store-bought fresh pasta have made the dish more accessible than ever, the act of rolling dough by hand remains a living tradition, taught not from written recipes but through repetition, feel, and the patient guidance of someone who learned the same way before them.
Simple ingredients, patient hands, and a little practice are all it takes to make pasta worth savoring. Buon appetito!
Calculate Portions by Guest Count
Select the number of people you're serving to get precise measurements
Portions for
2 People
300 g total Pasta
Portions for
4 People
600 g total Pasta
Portions for
6 People
900 g total Pasta
Portions for
8 People
1200 g total Pasta
Portions for
10 People
1500 g total Pasta
Portions for
12 People
1800 g total Pasta
Portions for
15 People
2250 g total Pasta
Portions for
20 People
3000 g total Pasta
Portions for
30 People
4500 g total Pasta
Portions for
50 People
7500 g total Pasta
Portions for
75 People
11250 g total Pasta
Portions for
100 People
15000 g total Pasta
Portions for
200 People
30000 g total Pasta
Quick Reference Guide
150g
Per Serving
600g
For 4 People
1500g
For 10 People
7.5kg
For 50 People
Related Categories
Pro Tips
- • Always prepare slightly more than calculated to account for hearty appetites
- • Consider the occasion: formal dinners typically require more precise portions
- • Account for side dishes when planning main course quantities
- • Store leftovers properly to minimize waste and extend freshness